**This post contains affiliate links and I will be compensated if you make a purchase after clicking on my links.
This tutorial will teach you how to make candy leis for graduation.

Giving out graduation leis is one of our families favorite traditions. It’s a fun way to celebrate a graduation ceremony, plus it gives the grad something to snack on while they sit through the ceremony (if they’re allowed to wear them).
While there are a variety of leis out there, in this post I’ll show you how to make a candy lei your grad will love. You can use just about any candy you’d like with this diy candy lei, however, I’ve found that the fun size candy bars are typically the best.
If the graduation ceremony is going to be outside, you may want to stay away from chocolates as those will melt rather quickly.
You can follow the steps below to make a candy lei that works with just about any candy. If you’d like to make something a little more special, you can check out a few of our other tutorials including:
How to Make a Candy Lei for Graduation
Step 1: Materials
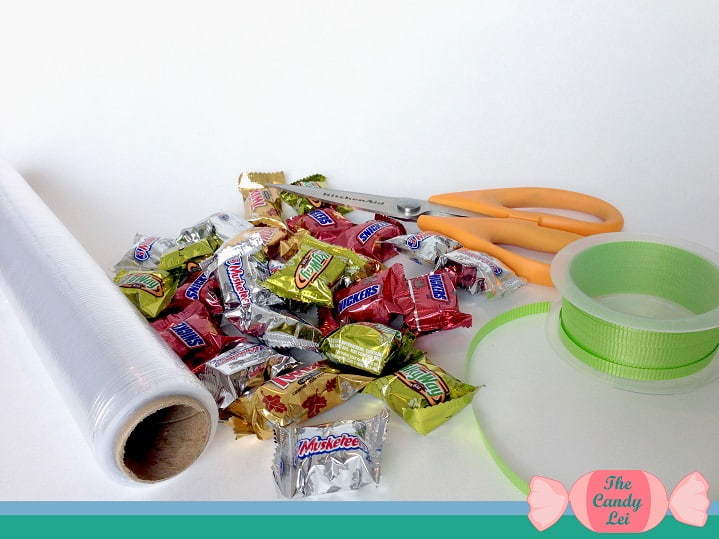
What you’ll need:
- Plastic Wrap: Saran Wrap or Cellophane work best.
- Ribbon: You can use fabric ribbon if you’d like however if you want to curl the ribbon then you’ll need to use curling ribbon (You can buy college specific ribbon here – with Prime shipping).
- Scissors: You’ll need this to cut the plastic wrap and to curl the ribbon.
- Candy: Use any candy you’d like.
Lei Making Essentials


Step 2: Roll out Plastic Wrap
You’ll want your candy lei to be between 35-40 inches. To make the process more manageable we will split this in half. Roll your plastic wrap out and cut it between 18 and 20 inches.

Step 3: Place Candy

Place your candy in a row on the bottom third of the plastic wrap. See picture above. Leave about an inch in between each piece.
Step 4: Roll the candy in plastic wrap
Take the shorter side of the plastic wrap and fold it over your candy. In the image above I took the plastic wrap below my candy and folded it up over the candy.

To finish rolling your candy in the plastic wrap use both hands to pinch the plastic wrap around the candy on each end of your row. Now simply roll the entire row up until the plastic wrap is wrapped around all of the candy. You should end up with something that looks like the image above.
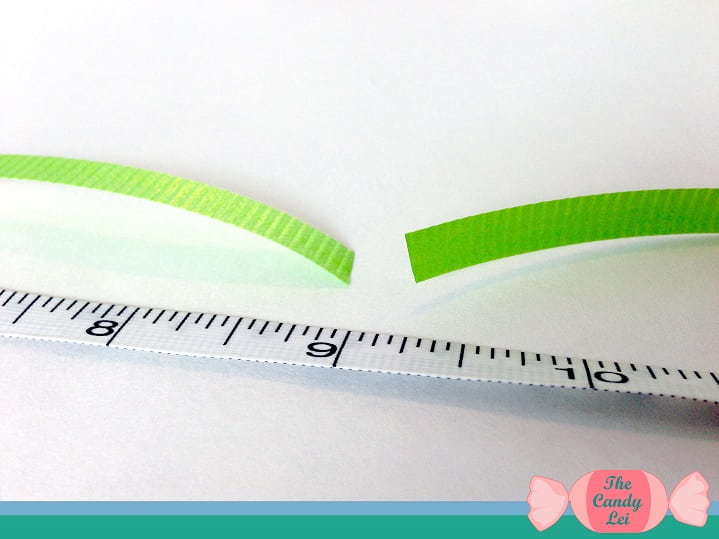
Step 5: Cut The Ribbon
We are going to tie ribbon in between each piece of candy. Cut each piece of ribbon to be about 9 inches long. This will give us enough length to tie a knot and curl the ribbon.
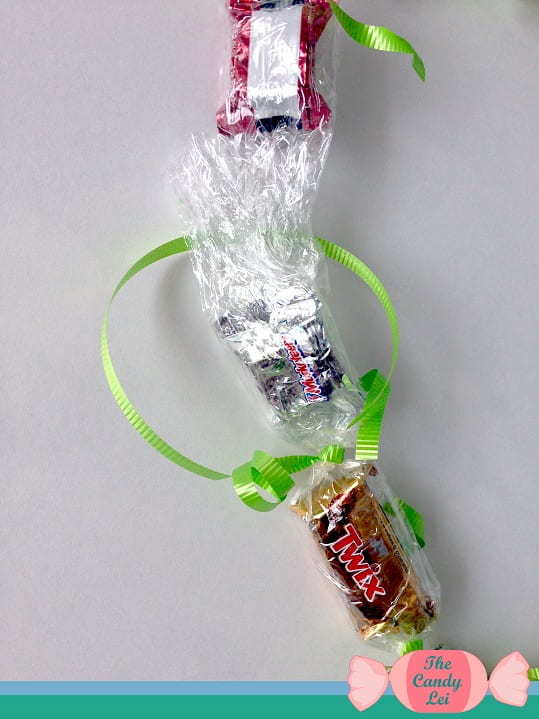
Step 6: Tie the ribbon
Slide each piece of ribbon underneath the plastic wrap in the open space between each candy. Tie a simple knot and pull it tight. Try to keep an even amount of ribbon on each side of the knot as seen in the image below.

Step 7: Curl the ribbon
To curl the ribbon you will first need your scissors. Open up the scissors and place the ribbon, close to the knot, on the blade of the scissors. Place your thumb over the ribbon and put a small amount of pressure on the ribbon as you pull the scissors down the ribbon away from the knot.
If you’ve never curled a ribbon before you may want to practice on some ribbon that is not tied to your lei. Too much pressure with your thumb you may accidentally cut the ribbon. You should end up with something like the image below.
Step 8: Repeat Steps 2-7
Now that we have completed the first half of the diy candy lei go back and repeat steps 2-7 to complete the second half of the lei. Once you have completed the second half go on to step 9 to connect the two halves together.
Step 9: Connect the two halves
Our last step is to tie our two ends together. To do this simply overlap the plastic wrap on two ends and tie them together with the ribbon. Be sure and double knot the two ends as this is the part that holds the entire lei together. Once you have tied them together curl the ribbon so it matches the rest of your lei. And now your done. Just like that you’ve made your first candy lei. It should look something like the picture below.

Thanks for reading through this entire tutorial! If you ran into any problems or just can’t seem to figure out a step let us know in the comments below and we’ll help you out.

Leave a Reply